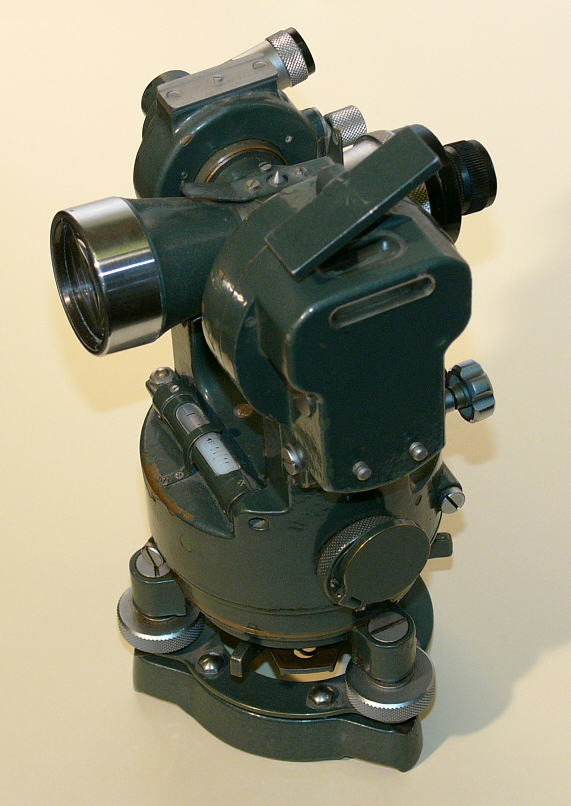
 Many accounts of inland navigation, particularly over desert terrain, give the transit theodolite as the chosen instrument for determining a fix by celestial navigation. On the positive side, theodolites are potentially very accurate and with the correct instrument it would be possible to get a fix on your position to within a couple of hundred metres. Theodolites are usually quite rugged and built to function in dusty environments such as would be encountered in the field or on a building site. The disadvantage of a theodolite is that it is mounted on a tripod! Tripods take up a lot of room. Another disadvantage is that the commonly available survey theodolite is are not designed for taking sights on celestial bodies. A special filter would need to be put on the telescope for taking sun sights. At night, when taking sights on stars, it is not possible to see the cross hairs in the telescope. (The usual approach is to wave a flash light somewhere near the object lens of the telescope so that the cross hairs are illuminated, but not so brightly that you cannot see the star!) So, the theodolite fails the criteria for compactness, lightness and ease of use, though it scores highly on reliability. Second hand theodolites are readily available and you would expect to pay around $500 for a reasonable instrument.
The marine sextant is an obvious consideration as it is readily available. Precision is generally in the region of 6 seconds of arc, which is the same as the common survey theodolite. They are reasonably compact. Disadvantages are that they are designed and made for a marine environment. Drop a marine sextant in the sand and you can expect to spend several hours cleaning it out - if it survives the fall! Too, marine sextants are designed to use the visible horizon, which is always part of the marine seascape, but seldom available in an inland environment. To use a marine sextant inland requires the use of an artificial horizon.
An artificial horizon for a marine sextant is usually a level mirror of some sort. The angle between the celestial body in the sky and the body as reflected in the mirror is measured with the sextant. This angle is halved to obtain the angle of the body above the horizon, which is what is required.
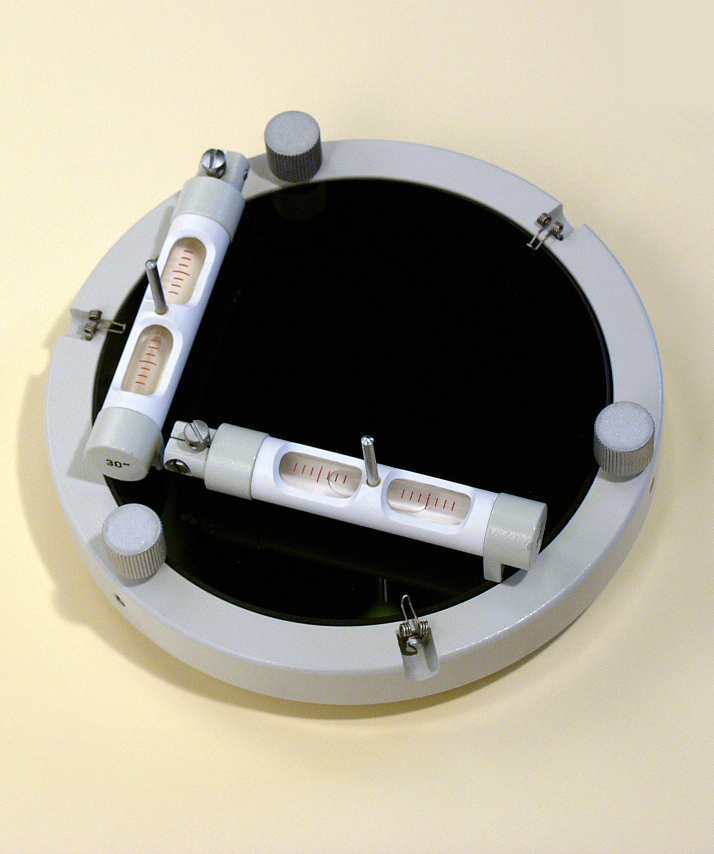 Special artifical horizon mirrors, like this example from Freiberger, have levelling feet and come with two levels to get the mirror to within 6" of horizontal. They are expensive. They need a firm, reasonably flat surface to sit on and take a while to set up satifactorily. Alternatively, a pan of mercury or even cold tea can be used as a mirror. Liquids have the advantage of being self levelling, so they are much easier to set up, but it is preferable to have some viscocity so that slight breezes do not disturb the surface. Molasses or used engine oil have been used with success. Davis offer a nice (and cheap) portable liquid mirror type artificial horizon, which has a cloche covering the liquid to keep the breeze off. Liquid mirror type artifical horizons are not fussy what sort of surface they set upon - a sand dune is as good as anything else. The disadvantage of all mirror type artificial horizons is that they can restrict the field of view quite severely, so that it is difficult to find the celestial body as reflected in the mirror - particularly at night when it can be difficult to see the mirror at all, let alone what star is reflected in it! Liquid type artificial horizons can be messy when it comes to comes to getting liquid out of the pan and back into the storage bottle - unless it is cold tea, then you just warm it up and drink it!
Some sextant manufacturers offer a bubble attachment for their marine sextants. Instead of adjusting the index arm to bring the celestial body down to the natural horizon as is usual with the marine sextant, the celestial body is brought down to coincide with the bubble in a small level. These are usually very tricky to use and involve holding the sextant absolutely still. Marine sextants are tilt invarient by design when using the natural horizon, (a good sighting does not require you to hold the sextant absolutely still as the sight picture does not change when you rock the sextant back and forth slightly), but are often not tilt invarient when using a bubble type artificial horizon.
So, marine sextants are reasonably compact and light, but they are not made for an inland environment and so are susceptible to sand, dust and dirt. They require an artificial horizon which can severely restrict their ease of use in the field. They are readily available though. New, they will cost around $2,500. Second hand examples can be bought in good condition for around $500. Beware the "replica" sextants that are often advertized new for around $150. These are not real sextants and while they do work, after a fashion, they are not suitable for serious celestial navigation work.
Aircraft bubble sextantsSextants for use in aircraft use the bubble type natural horizon and have the advantage that they are designed to use bubble type artificial horizons in the first place. It has been many years since aircraft relied upon sextants to find their way about the skies! All aircraft sextants available on the market now are over 40 years old and are military surplus or second hand. Most of the newer aircraft sextants (around 40 years old) are large units designed to be built into the aircraft as part of the fixtures and fittings. Older hand held models dating from WWII are available though. Many of these are still quite bulky as they contain averaging devices to average a number of sightings taken over a period of about 30 seconds. The averaging device is usually mechanically complex though and after 60 years or more of infrequent and sometimes inappropriate use, often does not work.
The Link A-12 aircraft sextant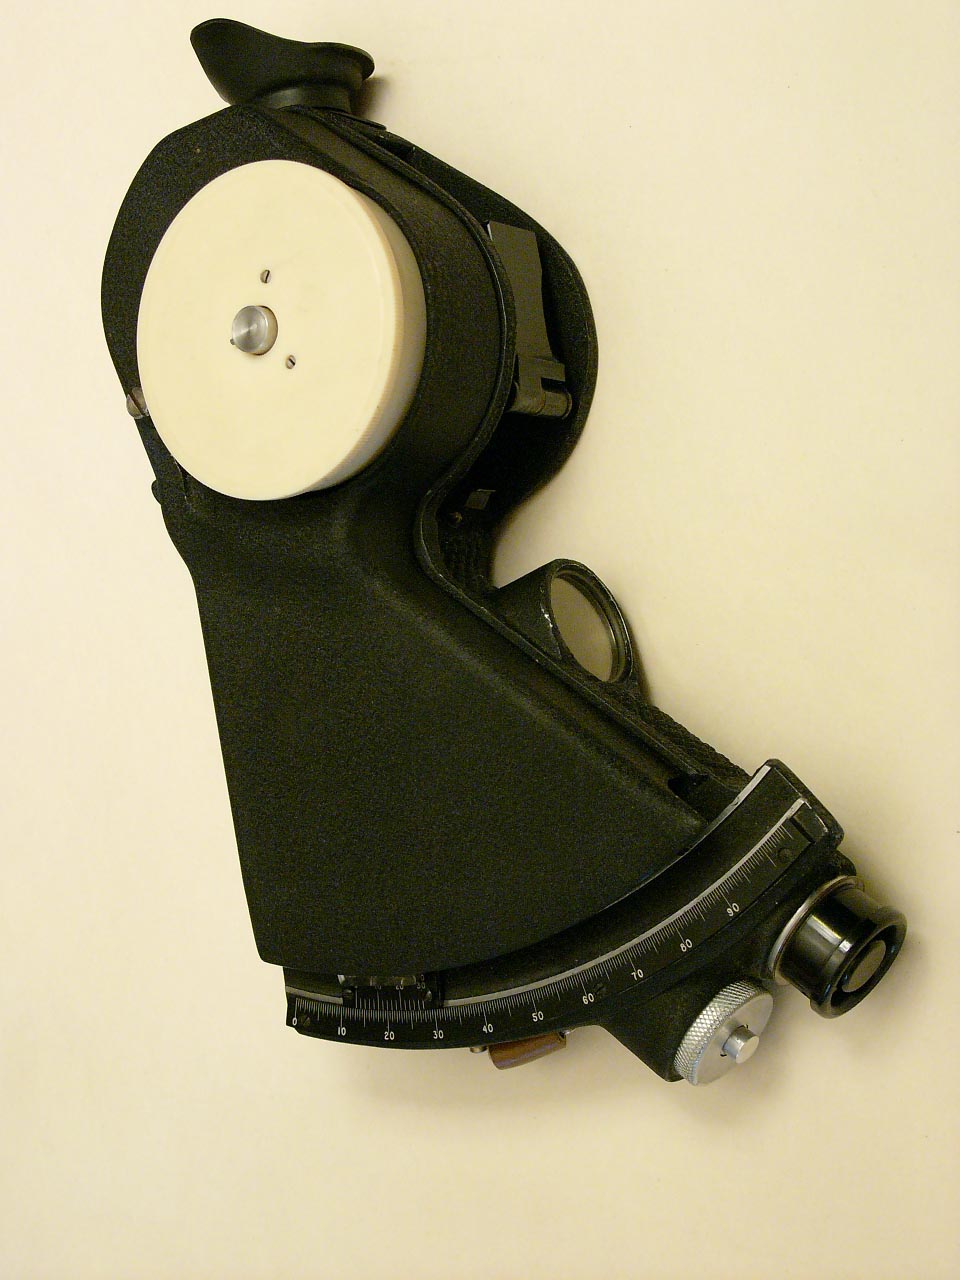 But there is one sextant, the Link A-12 aircraft sextant, which is perfect for inland use. Its design dates from before WWII and was made primarily for use in open cockpit aircraft.
It is not as precise as a theodolite or a marine sextant. There is no telescope, so magnification is unity. The vernier on the arc is only marked in two minute increments. But with care, an altitude can be read to one minute of arc which is equivalent to two kilometres on the ground. Generally, it difficult to be much more precise that this using celestial navigation anyway, so the relative lack of precision to which an altitude can be read on this sextant is not an impediment. It is compact (290x120x110 mm) and light (1.3 kg). Its simplicity of design makes it rugged and relatively impervious to dust and dirt. Drop one of these in the sand and you just blow the sand off and carry on. (Though it is a good idea to attach a lanyard to the sextant and put this around your neck when using the sextant. Then when you drop the sextant, it won't hit the ground!)
This sextant is easy to use either by day for sun sights or by night for star sights. There is no telescope to reduce the field of view, so acquiring the correct star for star sights is particularly easy. In fact, I have not seen any sextant which is easier to use at night than the A-12. When you are by yourself, hopping out of the tent to take a sighting, then hopping back inside (where the light is) to write down the time and altitude of that sighting, this sextant is far and away the best with regard to ease of use. It also scores highly for compactness, lightness and ruggedness.
These sextants are still available at the time of writing from Celestaire in the United States, freshly overhauled and calibrated, at a cost of $650. They also come up on ebay and other auction sites quite regularly and sell for around $150 - but of course, caveat emptor.
The box
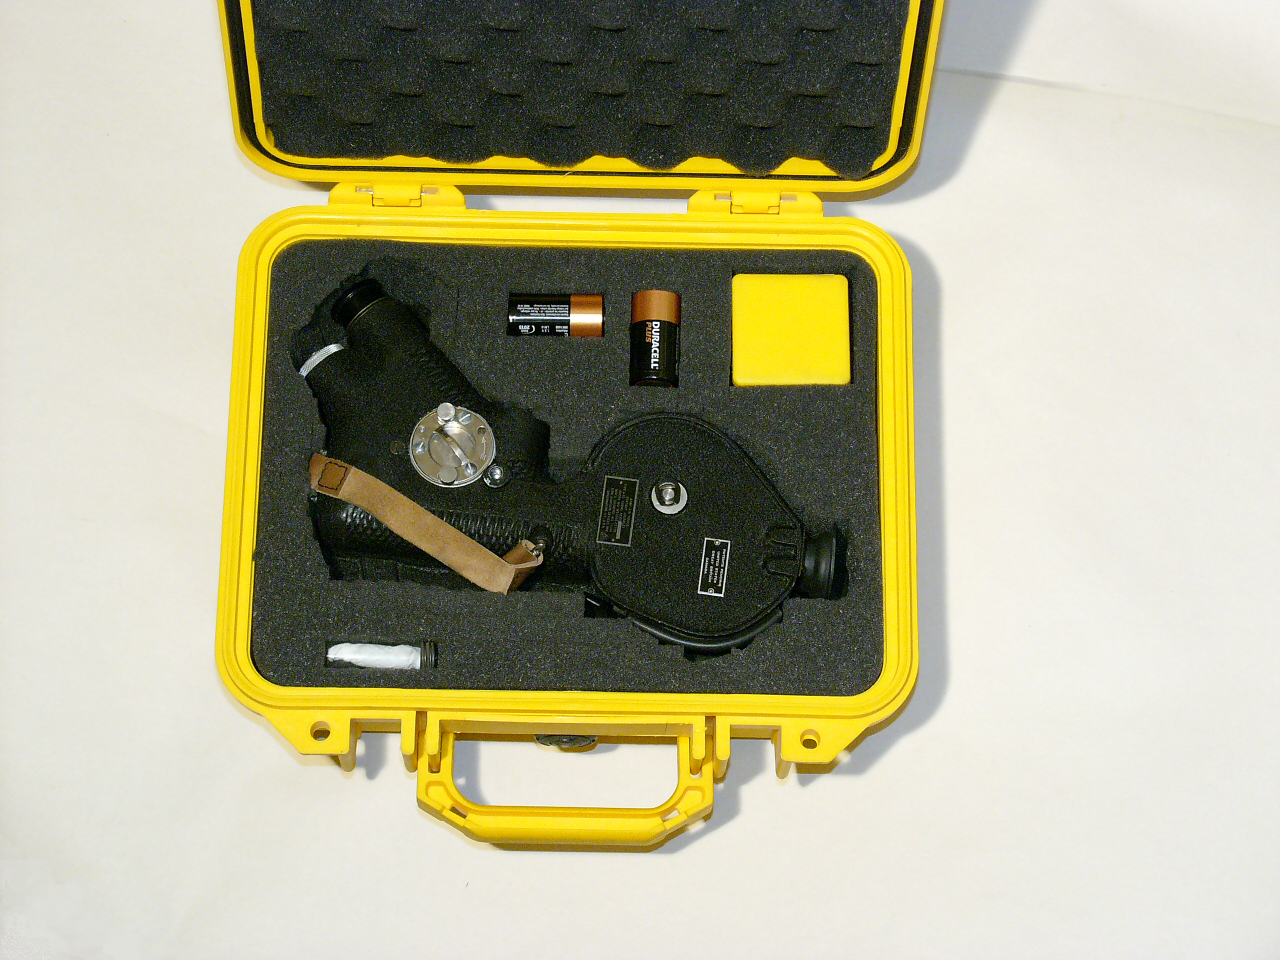 It is essential that the sextant is protected for the inevitable knocks, bumps and high energy impacts that happen when travelling or hiking in the bush. My solution was a Peli 1400 case in eyecatching yellow. (Not so eye catching in the desert sands, actually. But should it be mislaid in any other terrain it is easily found.)
The Peli cases are expensive - the 1400 will cost around $100 or more - but they are almost bullet proof. More to the point they are sealed when the lid is closed, so they are water proof and dust proof. I also kept the chronometer in the Peli case.
Another downside to all this protection is that the case takes up a lot of room in the rucksack. The external size of the 1400 is about 320mm X 280mm X 150mm. After a lot of thought on this matter, I persuaded myself that this was the smallest foam lined box available that would give the necessary protection. So this turns the sextant into a major piece of kit and not something that is slipped into a side pocket as an afterthought.
But for me, using a sextant to keep myself found is part of the fun of heading out into the bush, so I have a rucksack that is big enough to acommodate it.
The chronometerWhile your latitude can be determined without any accurate knowledge of the time, (using a sighting of Polaris, or the sun at noon), your longitude cannot be obtained with any precision unless you have an accurate knowledge of the time. For two hundred and fifty years, since Harrison built the first seagoing chronometers, the marine chronometer was the most accurate clock available and was the standard way that a navigator timed his sightings. They were always expensive and they can still be obtained today, both new and second hand, at a cost of around $2000.
But with the advent of quartz movements twenty five years ago, that all changed. Even a $2 watch you can buy on a garage forecourt is often better than a clockwork marine chronometer. At that price, you can afford to buy a dozen of them and pick out the best! They are also incredibly reliable and the battery usually lasts for years. Some form of quartz movement watch is definitely the way to go.
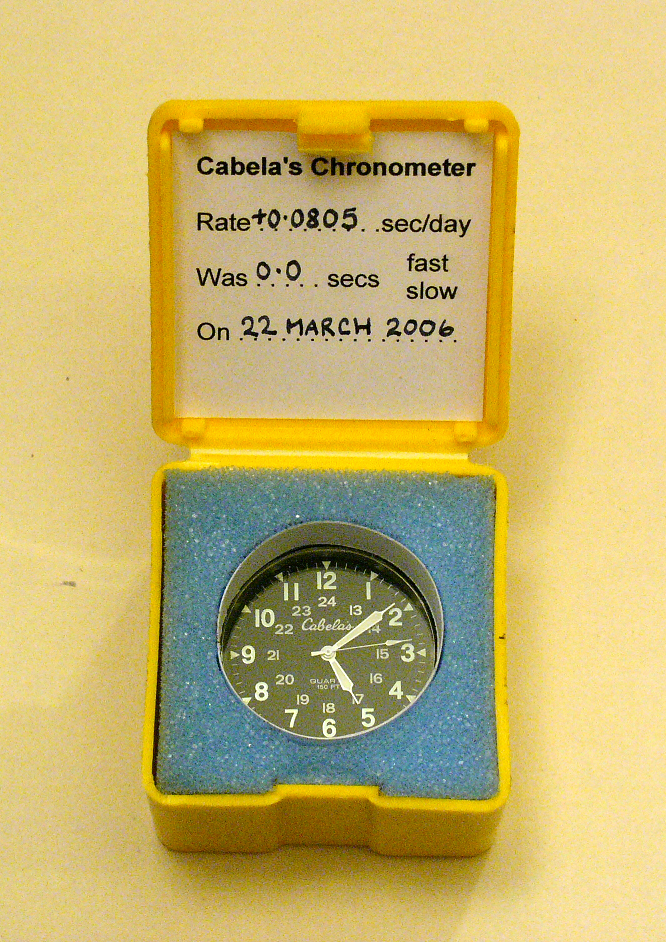 My chronometer was a small quartz analogue movement pocket watch sold by Cabela's sporting goods shop in the USA. It tells the time and nothing but the time, in the manner of all good chronometers. It has a stainless steel body, the "watch glass" is made of saphire and it will not leak with 50 metres of water on top of it. So it is a pretty rugged little time piece. Never-the-less, I put it into a small box surrounded by sponge.
I spent some weeks determining its daily rate (how much time it gains or looses per day) and wrote this into the lid of the box. Also recorded was the date I had last set the watch and how fast or slow it was on that date. With this information, it should be possible to determine Greenwich Mean Time (GMT) to good precision any time into the future.
On ships, (on navy ships anyway), many years ago when clockwork chronometers were used, a number of chronometers were kept in a special room deep in the bowels of the ship where the ship's movement was least and where the temperature was reasonably uniform. But sights with the sextant were taken on the exposed ship's deck, well removed from the cocooned chronometer room. So deck watches were used to take the actual time of the sighting. Deck watches were regularly compared to the ship's chronometers to ensure that any difference in time was accounted for when reducing the sight.
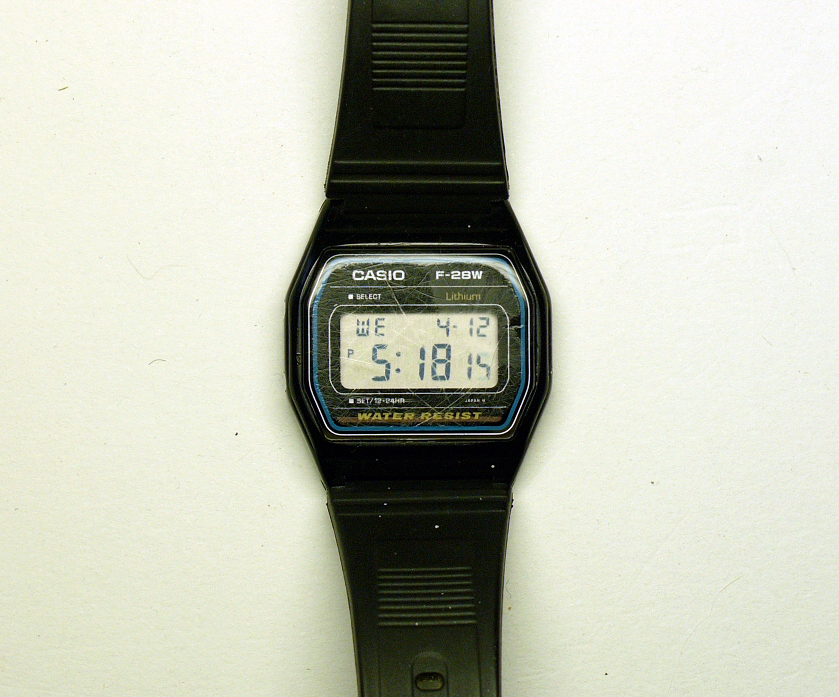 I also had a "deck watch", which was the wrist watch that I usually wear. I set my watch to the local time in Egypt, which was two hours ahead of GMT. The watch is a Casio F-28W. It shows the date and the day of the week, which is useful when you have been away from civilization for a week or so. It gives the time in digital form, which is useful in taking sights. (When using an analogue watch, it is easy to make a mistake on the minutes- especially out in the bush where conditions are less than ideal.)
As you can see from the photo, it is a pretty battered watch. It was pretty battered when I found it in a field ten years ago, and it has had a hard life since then. But it is actually a remarkably good time keeper and the first time I ever changed the battery was just before setting out for this trip!
One problem I did not anticipate came to light when I got back home. The chronometer was about 2.5 seconds faster than it should have been after the rate had been applied. It turned out that the quartz crystal in the watch had "aged" since I had bought it in October 2005 and over the intervening five months the crystal frequency had been gradually increasing. Looking back at my records of this chronometer's "daily rate" (the amount of time it gains or looses in one day), I see that when I turned it on in October 2005, it gained about 0.048 seconds a day. By January 2006, it was gaining about 0.074 seconds a day. Its rate now, some seven months after "turn on", is 0.207 seconds per day This aging is quite normal, but I had not taken this into account when determining the rate for the chronometer just before I left. The wrist watch, by contrast, had gained just half a second over the whole trip. As I always used my wristwatch to time my sights, they would have been correct to the nearest second. This is quite good enough for celestial navigation where an error in time of four seconds will result in a maximum error in longitude of one minute of arc, or two kilometres on the ground.
However, the lesson learnt here is that quartz chronometers should always be "aged" for at least six months before usine them in earnest as the source of GMT.
Sight ReductionTwo sets of computations are required to transform the sextant sighting to a position on a map, a process generally called the sight reduction. The first requires an ephemerides of the celestial body of interest (commonly called an almanac) which allows you to calculate its geographical position at the time you took the sight. The standard book for giving the positions of the celestial bodies is the Nautical Almanac, which gives the positions for the sun, the moon, the visible planets and 58 stars each day for a period of one year. The second set of computations is the solution of the navigational triangle using spherical geometry to calculate the altitude and azimuth of the celestial body from your estimated position. This is usually done using sight reduction tables. With this information, a position line can be plotted on your map or chart.
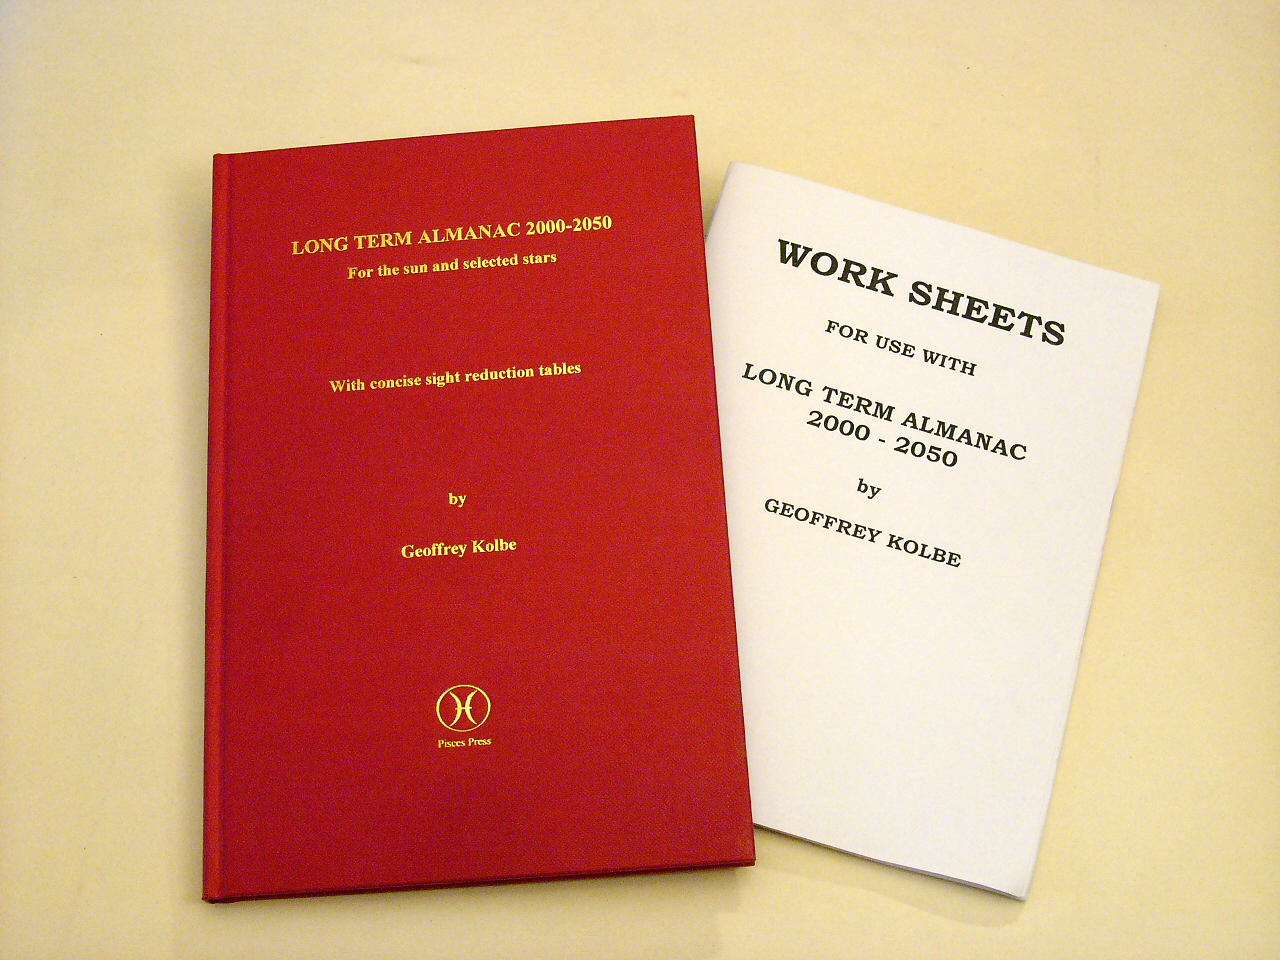 The only problem with the Nautical Almanac is that it is only good for one year. It is easy to forget to renew it, or even have it go out of date on an extended trip which goes over into the next year. For this reason, I wrote my own almanac, the "Long Term Almanac 2000 - 2050" for the sun and selected stars, which is good for 50 years from the year 2000 to the year 2050. It is a hardback book, somewhat smaller than the Nautical Almanac and also has a set of concise sight reduction tables in the back. It is (to my mind) easier to use than the Nautical Almanac and is somewhat smaller in size - though it does not give as much information on as many celestial bodies as the Nautical Almanac.
Also shown in the photo is a book of worksheets to help with all the necessary calculations. The time to reduce the sight takes about 20 minutes using the worksheet. The entire process of taking the sights to plotting the final position can be performed without the requirement of any batteries or electronics to go wrong. Ruggedness and durability is therefore very high. But the possibility of making a mistake in the calculations is quite significant - particularly at the end of a long day when one is tired. Results need to be carefully checked to ensure no mistake has been made.
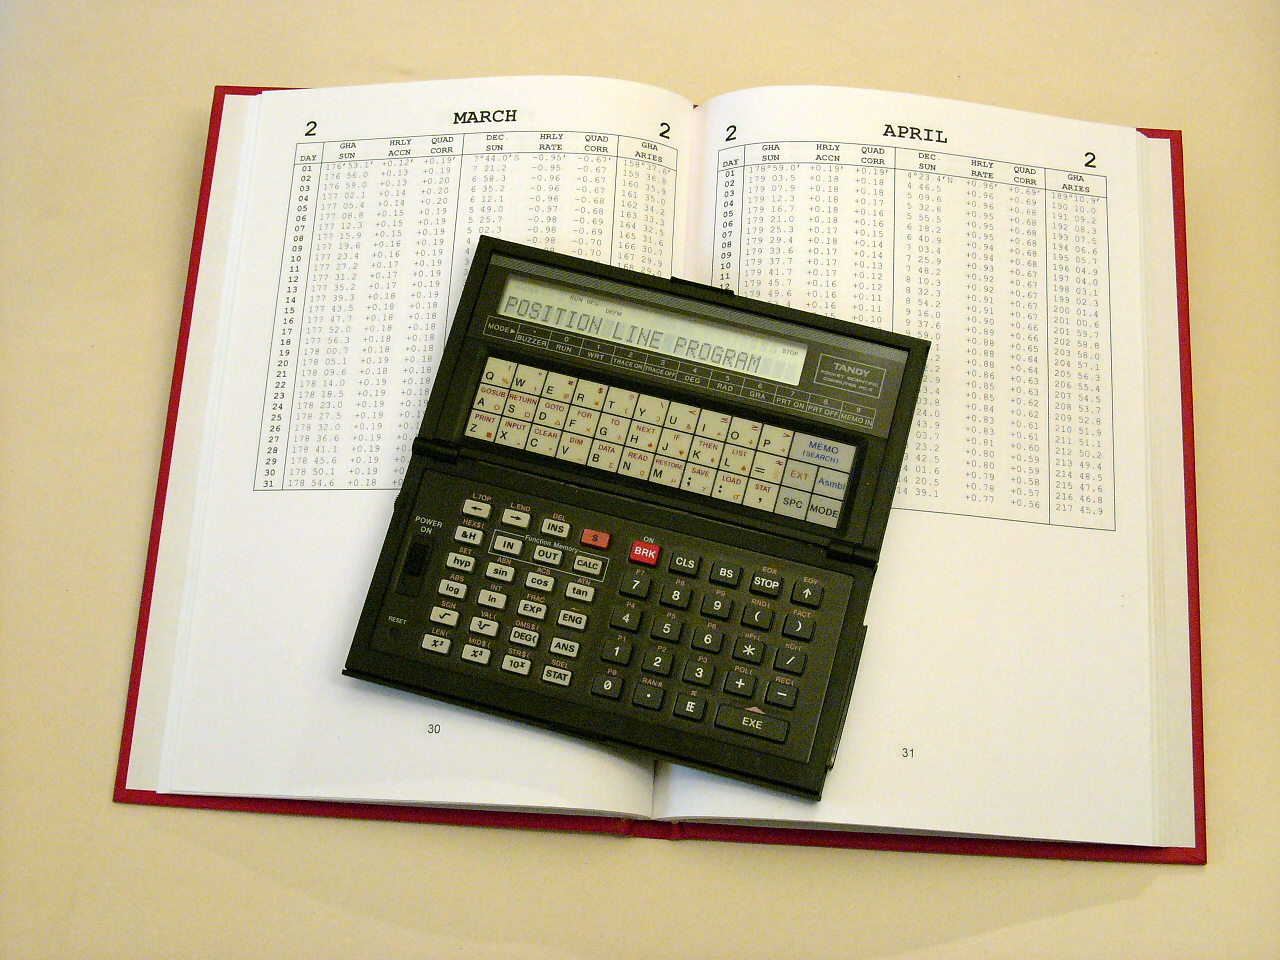 I took my own almanac and a book of worksheets. But the worksheets were actually an emergency back up for a Tandy T-6 "Pocket Scientific Computer" which I used to perform the necessary calculations. (While perfect for the job, I have had this calculator for 20 years now, so it long obsolete. There are many programmable calculators on the market though, which will do just as well.) Data from the "Long Term Almanac" for the day in question was entered into the calculator. The time, estimated position and altitude as measured with the sextant was also entered. The calculator then chewed on this for a few seconds before giving me the azimuth bearing and an intercept, from which I could draw a position line on the map. Battery life is a couple of years for this calculator, so that was not an issue for this trip.
The program in the calculator had been extensively tested before the trip. But on the first night during the trip when I tried to use the calculator, I found there was a bug in the program and I could not reduce a sight on the star Sirius! I had visions of having to use my worksheets for the entire trip. So I spent an hour in my tent, late at night, working by the light of my small head mounted flash light, copying out the program from the calculator and figuring out where the bug was. It turned out that a little modification I had made to the program just before I left for the trip had some unforeseen consequences. I also found three more small bugs and fixed those, so that the program actually gave a more accurate result. The calculator performed faultlessly thereafter and was a great saving in time and effort.
There are people who write navigation programs for programmable calculators such as the Texas Instruments TI92. These have an almanac accurate for hundreds if not thousands of years built into the program, along with sight reduction algorithms. They are neat and quick to use. But, to my mind, it is a mistake to rely solely on an electronic device for your almanac and sight reduction. Using a calculator in conjunction with the paper based almanac added greatly to the ease of use. Having the paper based worksheets as a backup meant that ultimate reliability was not compromised.
I consider that the choice of my Long Term Almanac with a book of worksheets and the programmable calculator maximised the elements of lightness, compactness, ease of use and reliability.
MapsDuring the 1970's, the Soviets made a set of detailed maps covering the entire planet, called the Soviet World Series. Since the collapse of the Soviet Union, these maps have become readily available at a reasonable price as there is no copyright on the maps! By common agreement, these are the best generally available maps for this area of East Libya/West Egypt. I obtained my maps from Touratech in Germany. They come on a CD in .png format, which can be opened with programs such as Adobe Photoshop. I used the 1:500,000 scale series of maps, which cover five degrees in longitude and two degrees in latitude. I printed these out on A3 size paper and found them to have a good balance between detail and coverage. The writing is all in Russian, of course, but it is reasonably easy to transliterate the place names with a cyrillic-roman alphabet comparator.
Other maps of the area are listed at websites such as http://www.sahara-overland.com/maps/. The classic map of the Sahara and North Western Africa is the old Michelin 153 map, now replaced by the 741 map. But, at a scale of 1:4 million, it is not possible to do good celestial navigation on such a course scaled map.
Plotting tools
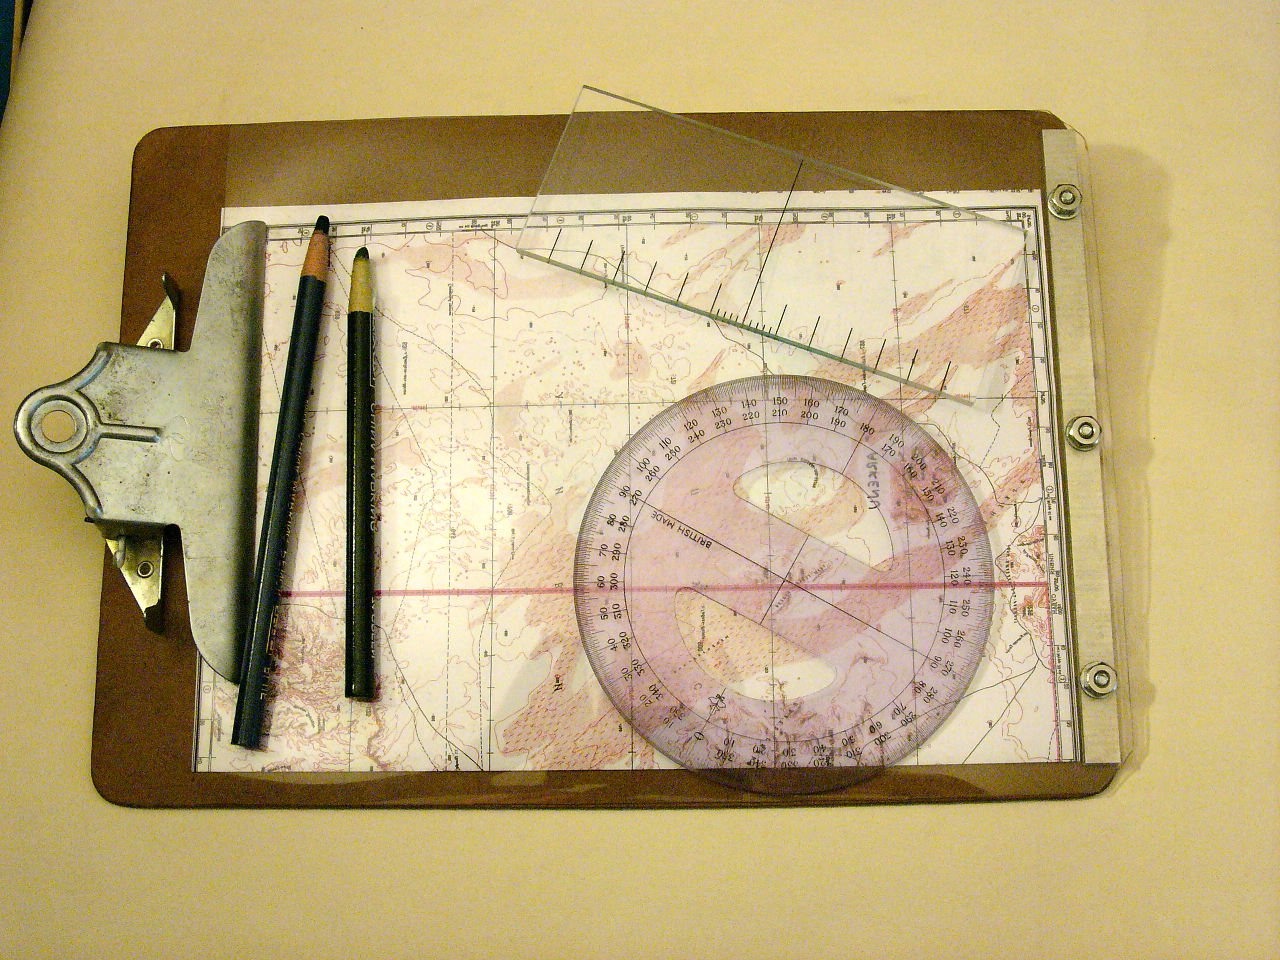 At sea, on large ships and small boats, a chart table is available to lay out the chart and plot the position. In a small tent in the middle of the Sahara desert, some ingenuity is required to devise something that will serve as a chart table. My solution was a clipboard, onto which I had attached a piece of stiff, clear plastic sheeting. The map was folded in half and with the clip on the clipboard lifted, the map was slid under the plastic sheet with the appropriate side face up. With the clip down, the map was nicely clamped in place.
My instruments were a blue and a green "China Marker" pencil, of the sort used for writing on glass and which would write on the plastic sheet. I also had a full circle protractor and a ruler, which was made from a piece of Perspex (Plexiglass) and marked in five minute graduations along one side. One minute graduations were marked in the middle of the ruler and the central line extended the full width of the ruler as an aid to drawing the position line. In general, I used the blue pencil to mark the estimated position and the azimuth bearings. I used the green pencil to draw the position lines.
I was very pleased with this arrangement and it worked out very well. The only minor problem was that I kept the pencils in a small pocket in my daytime rucksack, where the points broke off several times. A stiff tube to act as a pencil box would have been a better way of storing the pencils.
The compassThe compass traditionally used for desert travel is a sun compass. Unlike a magnetic compass, the sun compass has the ability to indicate a true heading which is not affected by the metal work of the vehicle on which it is mounted. Sun compasses, especially WWII examples, are rare and very expensive. But it is comparatively simple and cheap to make an accurate sun compass. They are effectively a mobile sun dial, so need setting up for the approximate latitude and time of year. They also need adjusting for local time when it is used to find a heading. The biggest disadvantage for me was that the sun compass needs to be attached to the vehicle where it is in the sun! This is usually on the hood of the vehicle, or on a special fixture fitted to either side of the vehicle, where it can be mounted depending on which side the sun is. I did not feel that I could impose my wish on the tour organizer to have sun compass fixtures bolted to the vehicle in which I was travelling! So, I resorted to taking a magnetic compass and making the best of it I could.
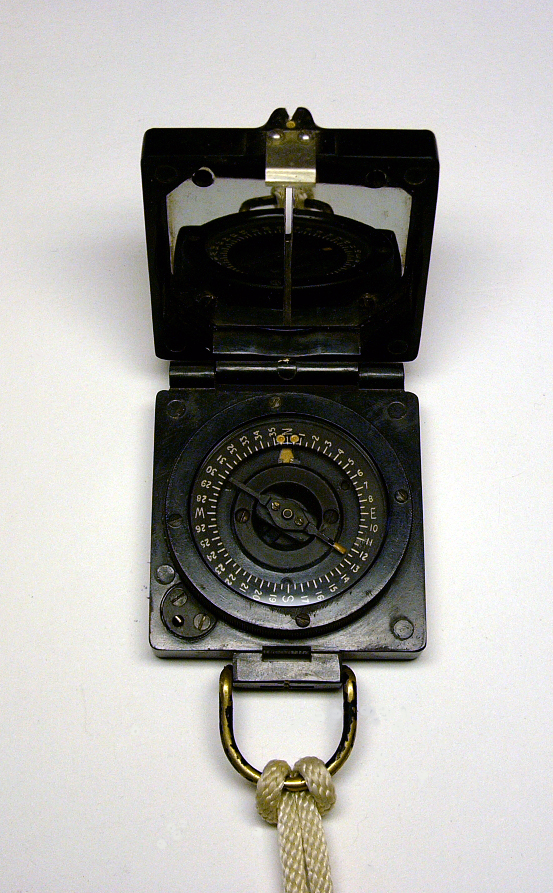 The compass I took with me was a British army Mk I "magnetic marching compass" dating from WWII. It has no special virtues, except that it works and it is the only compass I have.
The compass was also useful later in the trip when I started to take sightings on the sun for longitude. I used the compass to tell me when the sun was due West in the evening, and due East the next morning, then took a sightings with the sextant at those times.
Magnetic compasses do not point true North at the North Pole (latitude 90°), but at the magnetic North Pole. The location of the magnetic North Pole wanders around over time, but in 2005 its location was 82N07,114W04 near Ellesmere Island, the biggest of the Queen Elizabeth Islands, in Canada. The difference between true North and magnetic North is called the variation. The variation differs depending on where you are on the earth. Most good maps will show what the variation in the centre of the map was on a given date and how the variation was expected to change over time, so that the variation for the present day can be calculated. My Russian map gave a variation of 2° 11' East, but there was no date when this was correct or what the rate of the variation was - so I measured the variation myself on Sunday, 26th of March 2006, while waiting at the Sollum border post for permission to get out of Egypt and enter Libya.
Taking the compass away from any metal structure that would give a compass deviation error, I took a bearing on the sun and measured an azimuth of 101° at a time of 06 03 10 GMT. From the map, the coordinates of Sollum were estimated to be 31N30,25E05. The calculated azimuth was 101°. So, for this compass, The variation appeared to be zero at this time.
The compass was also useful later in the trip when I started to take sightings on the sun for longitude. I used the compass to tell me when the sun was due West in the evening, and due East the next morning, then took a sightings with the sextant at those times.